node-red-contrib-lsh-logic 3.1.11
A Node-RED node for coordinating devices that implement the public LSH MQTT/protocol contract.
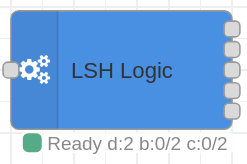
Node-RED Contrib LSH Logic

![]()

![]()


node-red-contrib-lsh-logic is the Node-RED node that runs the LSH
coordination logic inside a flow. It listens to the public LSH MQTT contract,
keeps a live registry of configured devices, coordinates distributed long-click
actions, publishes commands, and emits alerts when a bridge or controller needs
attention.
The package also includes two small helper nodes:
lsh-external-statestores non-LSH actor state in the context shape that the coordinator reads for smart toggles;lsh-actuator-syncmirrors a downstream smart device state back to the LSH actuator that powers it.
The original LSH installation uses Controllino controllers and ESP32 bridges, but the useful boundary is the protocol: if a device stack publishes the same LSH and Homie topics, this node can orchestrate it from Node-RED.
When to Use It
Use this node when Node-RED should own the orchestration layer for LSH-compatible devices:
- track configured devices, actuator state, and Homie lifecycle;
- react to long-click and super-long-click events;
- send commands back to LSH devices;
- route generic intents to flows that target Zigbee, Tasmota, Home Assistant, or custom systems;
- keep external actor state available for smart-toggle decisions;
- synchronize downstream smart bulbs or modules back to the upstream LSH relay when an external app changes their state;
- keep startup, watchdog, and recovery behavior predictable after restarts.
The node is focused on LSH messages; its input expects the LSH protocol. Keep other devices in normal Node-RED flows, and handle LSH-generated intents through the Other Actor Commands output.
Install
Install it from the Node-RED Palette Manager, or from your Node-RED user directory:
npm install node-red-contrib-lsh-logic
Node.js 18 or newer is required.
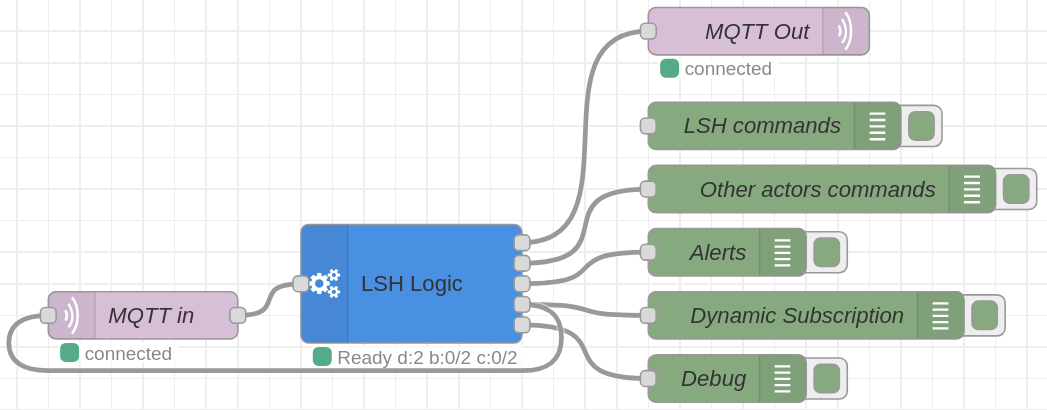
Basic Wiring
The usual flow is small:
- Wire
mqtt inintolsh-logic. - Wire output 1 to
mqtt outfor LSH commands. - Wire output 2 to your non-LSH actor flow.
- Wire output 3 to notifications or a debug node.
- Wire output 4 back to the same
mqtt innode for dynamic subscriptions. - Use output 5 while developing or diagnosing a flow.
Dynamic subscriptions are the recommended setup. Leave the mqtt in topic empty
and let lsh-logic keep the topic list aligned with the devices in the inline
System Config.
Example import: examples/lsh-logic.json
Configure the Node
Most installations touch two places:
- the Node-RED editor fields for MQTT paths, payload protocol, timing, and optional context exports;
- the inline System Config JSON, which lists LSH devices and long-click actions.
The editor validates that JSON against the LSH System Config shape, offers
LSH-specific JSON completions/snippets, previews the exact MQTT topic set, and
can import the generated lsh-stack-config/v1 export from lsh-core.
Multiple lsh-logic nodes can run in the same Node-RED runtime when each one
owns a distinct LSH stack, MQTT topic space, or isolated test flow. Keep their
context export keys separate when helpers read exported state or config: use
flow for self-contained flows, global when helper flows must share the same
coordinator exports, and none when no flow needs that optional export.
Start with a small config and add actions one at a time:
{
  "devices": [
    {
      "name": "c1",
      "longClickButtons": [
        {
          "id": 1,
          "actors": [
            {
              "name": "j1",
              "allActuators": true,
              "actuators": []
            }
          ],
          "otherActors": ["zigbee_table_lamp"]
        }
      ]
    },
    {
      "name": "j1"
    }
  ]
}
That means: when device c1 reports a long click on button 1, toggle all
actuators on device j1 and also emit an intent for zigbee_table_lamp.
Outputs
| Output | Name | Typical destination |
|---|---|---|
| 1 | LSH Commands | mqtt out, for commands to LSH devices and bridge service. |
| 2 | Other Actor Commands | User flows that translate generic intents to other systems. |
| 3 | Alerts | Notifications, logs, metrics, or a debug node. |
| 4 | Configuration | The same upstream mqtt in node for dynamic subscriptions. |
| 5 | Debug | Original inbound messages after successful processing. |
The second output is deliberately protocol-neutral. The node emits the intended state; your surrounding flow decides how a Zigbee light, Tasmota plug, Home Assistant service, or local script should receive it.
External State Helper
Use lsh-external-state when a non-LSH actor appears in otherActors and the
coordinator must know its current boolean state before choosing a smart-toggle
direction. The helper accepts MQTT or flow messages from ESPHome, Zigbee2MQTT,
Shelly, Home Assistant, or custom integrations, normalizes the configured state
property to a boolean, and stores it as:
<otherDevicesPrefix>.<actorName>.state
Retained MQTT state is accepted by default because this helper only stores
observed state; it does not command devices. Point External State Store at
the same context selected by the lsh-logic node in Read External Actor
State. The prefix can come from the exported lsh_config.otherDevicesPrefix,
which avoids mismatches when the main node uses a custom prefix.
Multiple lsh-external-state nodes can run in the same Node-RED instance. They
do not conflict when each instance stores a different actor, or when separated
flows intentionally use different context stores or prefixes.
Example import: examples/lsh-external-state.json

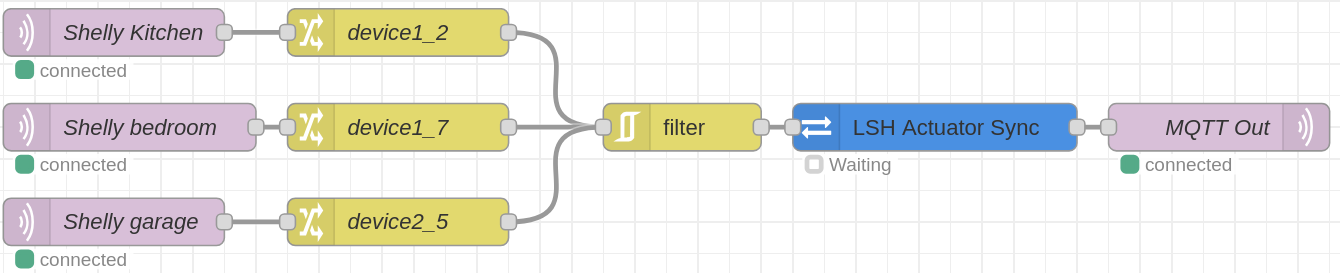
Actuator Sync Helper
Use lsh-actuator-sync when a smart device is powered through an LSH actuator
but can also be controlled from another app or system. The helper consumes those
external state updates, reads the selected lsh-logic context exports, and
emits a Homie state/set command only when the upstream LSH actuator needs to
be aligned.
The flow remains explicit: collect the external device state, use a Change node
or Function node to add msg.deviceId and msg.actuatorId, then wire the helper
output to the same MQTT output used for LSH commands. If you run more than one
lsh-logic node, give each one unique state/config export keys and point each
helper instance at the matching keys.
Multiple lsh-actuator-sync nodes can run side by side. The normal pattern is
one helper policy per downstream device, or per group of devices that share the
same retained-message, direction, cooldown and state-parsing rules.
Example import: examples/lsh-actuator-sync.json
Runtime Behavior
The node is intentionally conservative. It reuses retained conf and state
snapshots, but it does not treat retained lifecycle traffic as proof that a
device is alive right now. Distributed clicks are confirmed only when target
state is authoritative, and recovery probes are rate-limited so an unreachable
device does not flood the broker.
The Node-RED status text stays compact: it reports coordinator state plus device registry, bridge and controller reachability counts.
JSON payloads are the default. MsgPack is available when your firmware supports
it and the upstream mqtt in node preserves LSH payloads as Buffers.
Documentation
The full documentation map lives in DOCS.md. Start there when you want configuration details, optional Homie discovery guidance, dynamic subscription behavior, or the lifecycle contract.
If you are new to the wider LSH stack, the project-level starting points are:
Maintainer Notes
The published package supports Node.js 18 or newer. The local quality gate runs type checking, linting, Markdown checks, formatting checks, package validation, coverage, and a production dependency audit:
npm ci
npm run check
License
Apache-2.0. See LICENSE.