node-red-contrib-ibm-maximo-oslc-api 0.1.5
Maximo Oslc Api node for Node-RED
node-red-contrib-ibm-maximo-oslc-api
A Node-RED node wrapper for IBM Maximo Oslc Api requests.
Install
Run the following command in your Node-RED installation folder
$ npm install node-red-contrib-ibm-maximo-oslc-api
Or
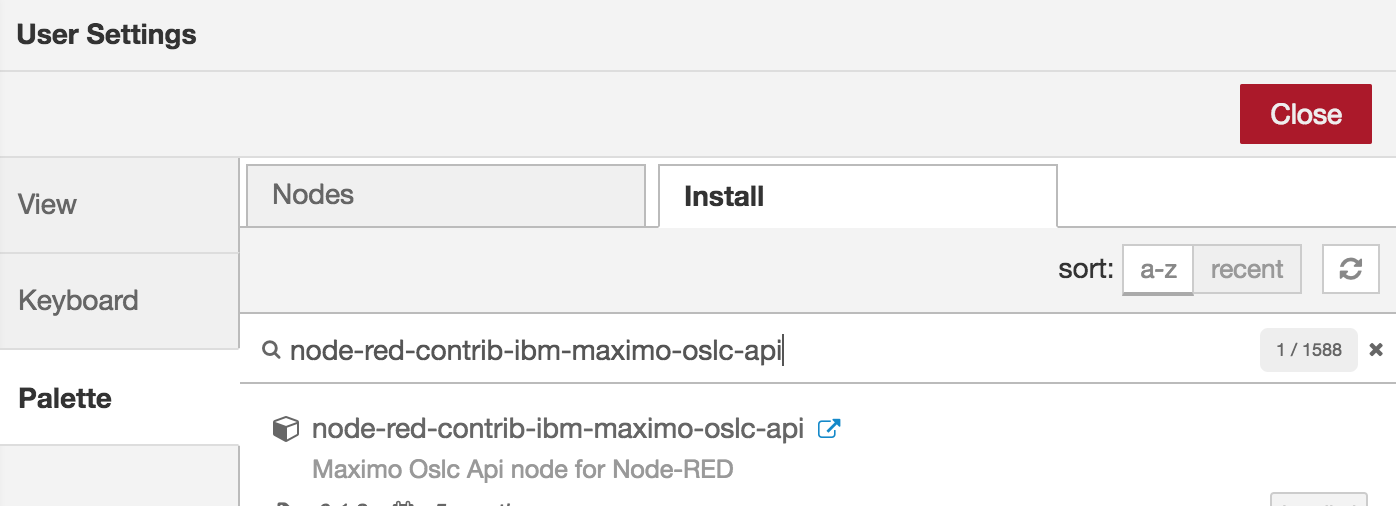
Install using the Node-RED User Settings > Palette > Install, searching for node-red-contrib-ibm-maximo-oslc-api
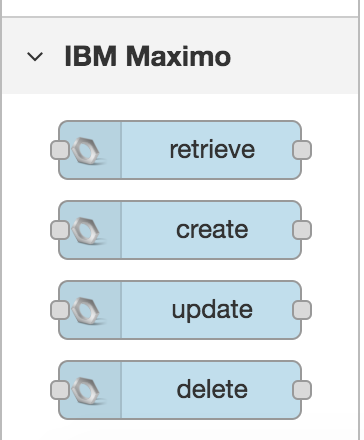
Once the plugin is installed, you should have 4 new nodes:
How to Use
To use this plugin you must have a Maximo instance (version 7.6 or above), understand the Maximo Oslc Api and have an user with the right access to send api calls. That information can be found in Maximo Nextgen Rest API
Maximo Connection
Every node has a Maximo Connection field which is used to select the Maximo Connection to be used when making the request
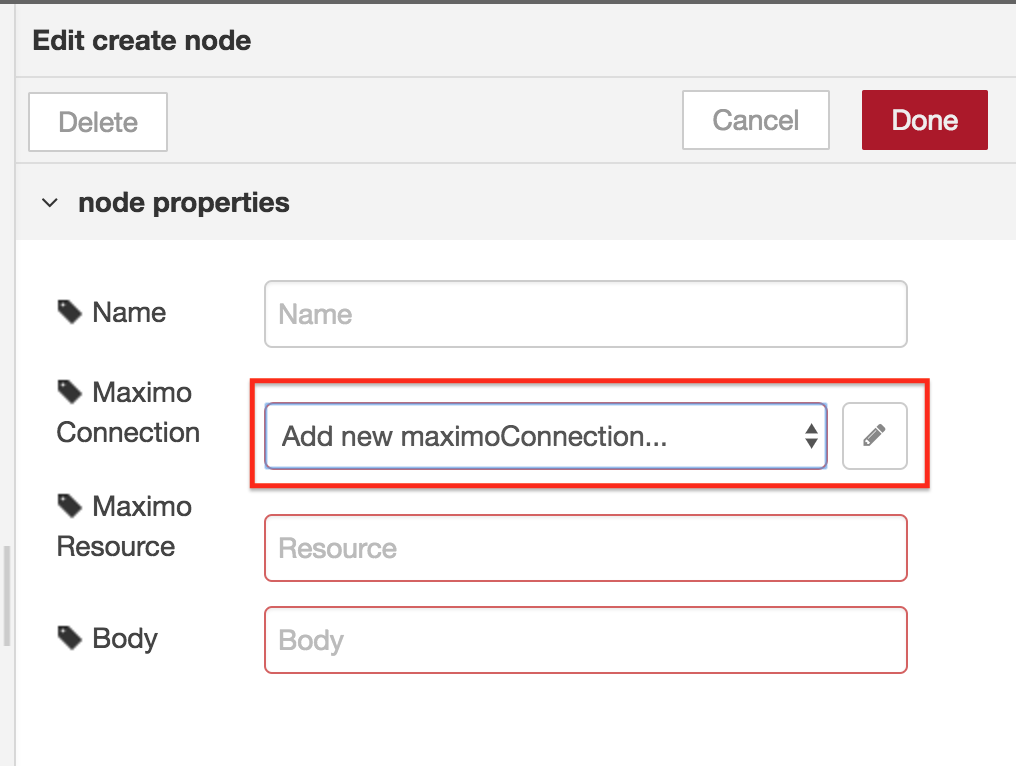
Creating a new connection
Click on the pencil button to create a new Maximo Connection
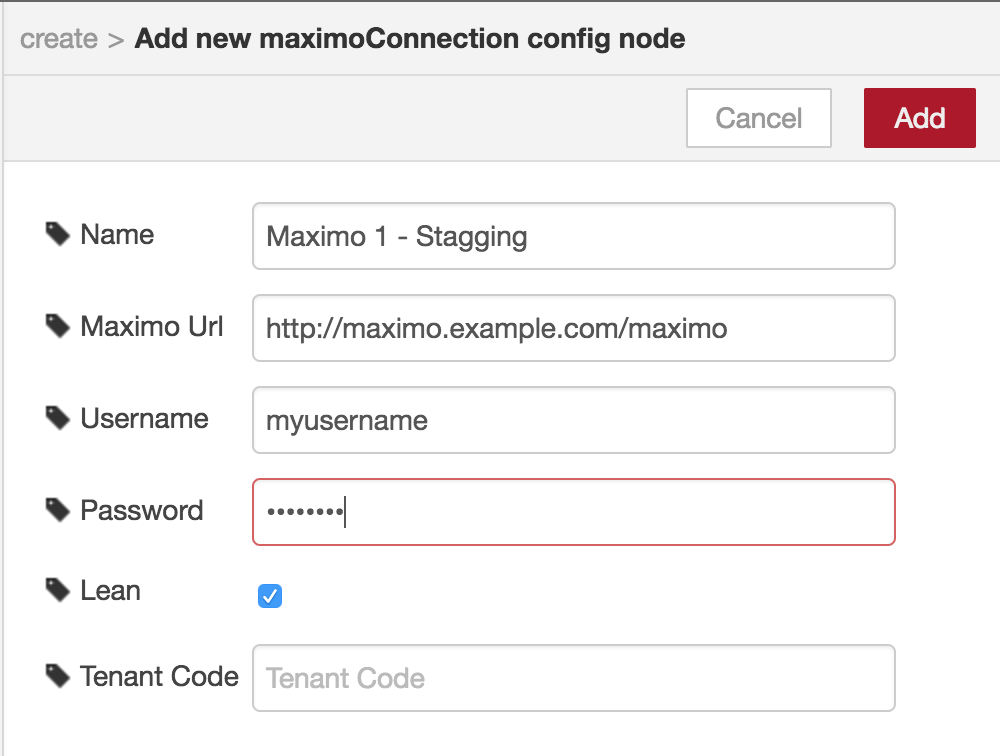
Where:
- Name is the connection name
- Maximo Url is the address to your Maximo instance
- Username and Password are the Maximo credentials
- Lean is a default option to make the responses without namespaces
- Tenant Code if your environment uses tenant codes, then you can specify which one you want to use
Check if your user has the right permissions to make your requests
Examples
Retrieving Service Requests
To get a list of Service Requests where the owner is [email protected] add a retrieve node to your flow:

Double click to access the properties and fill the fields as in the image bellow:
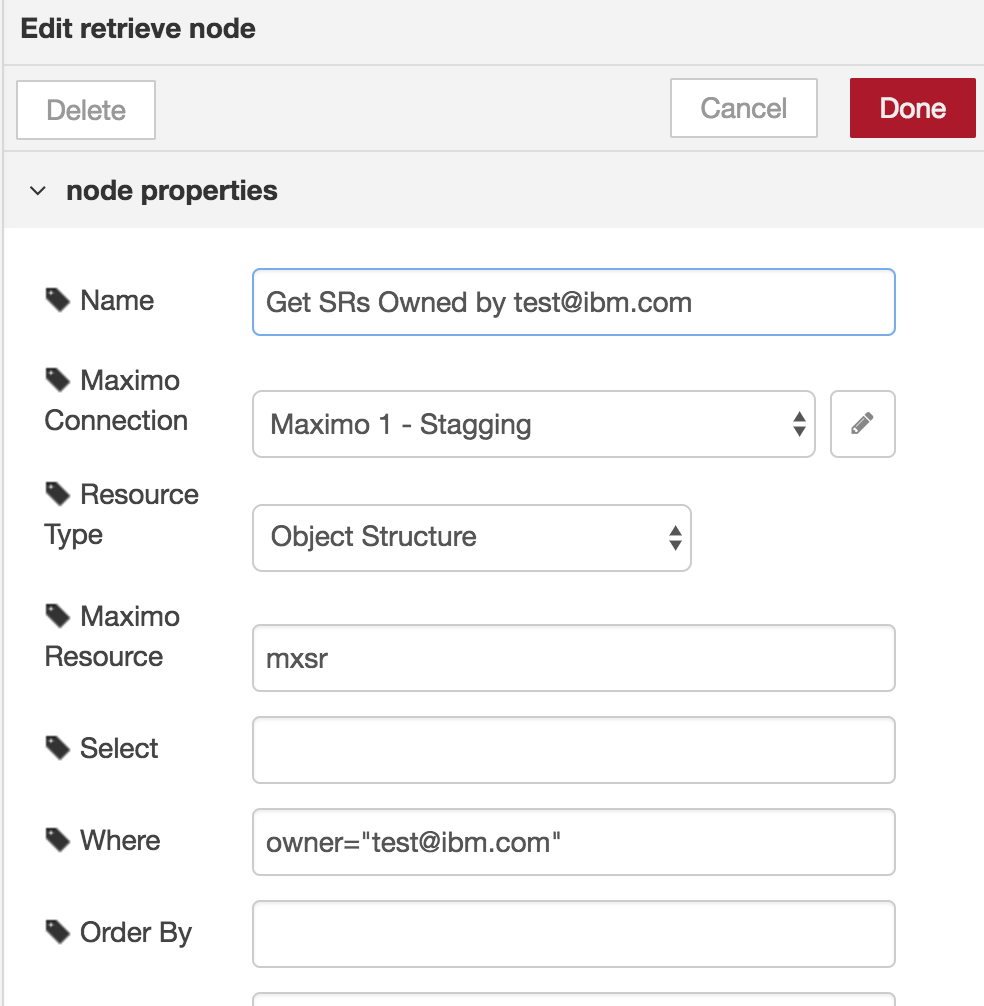
Where:
- Name is the display name. It will be shown in your flow
- Maximo Connection is the connection we created earlier
- Resource Type is related with the field Maximo Resource. For this example we will use the option Object Structure
- Maximo Resource in our case is mxsr. Mxsr is the object structure that deals with Service Requests. If you choose Full Url on Resource Type you can specify here the full url to the resource you want to retrieve
- Where is the where clause to our example
- Page Size (not shown in the above image) in our case we will limit the records returned to 10
You can specify other fields, for example Select to retrieve just the fields you want. See Maximo Nextgen Rest API for more details.
To test our example, we can add an injection node to the begining and a debug node (to show all message not just the payload) to the end of our flow:

Now we can deploy and test our flow.
Tip: Notice the node has changed to some states when running:
- Connecting
- Connected
- Sending
- Retrieved
Every node has this feature to make it easier to see what happened and debug
We can check the results on Debug tab:
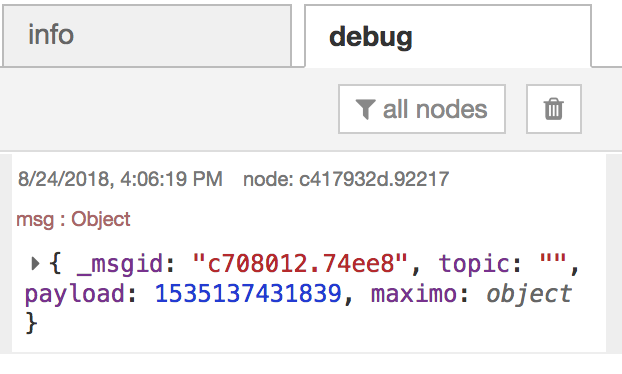
This is the entire message. You can use the payload in the next nodes or make your own validations using the built-in function node
The response will be in the maximo.response.payload object and will be equals to the data returned from Maximo (See Maximo Nextgen Rest API for more details)


