@tq-bit/node-red-contrib-server-sent-events 1.6.8
Nodes to create - or subscribe to - server-sent events
Node Red Server Sent Event Nodes


The Node-RED SSE Package is a collection of two nodes that provide functionality for working with Server-Sent Events (SSE) in Node-RED. Server-Sent Events is a technology that allows the server to push updates to the client in real-time over a single HTTP connection. This package simplifies the process of implementing SSE functionality in your Node-RED flows.
Nodes
SSE Server Node
The SSE Server node allows you to create a server that clients can subscribe to. All connected clients will then receive realtime notificaitons from another input node. This node must originate from a default http in node.
Example: Configure the node
To set up the SSE Server node, follow these steps:
- Drag and drop the http in node from the Node-RED palette onto your flow.
- Configure the http in node with the desired endpoint the HTTP GET method
- Connect the http in node to the SSE Server node.
- Connect an inject node into the SSE Server node.
- Configure the SSE Server node by specifying the event name and data to be sent to the subscribed clients.
- Deploy your flow to activate the SSE Server.
- Once the SSE Server is up and running, clients can subscribe to it using the SSE Client node described below.
- Alternatively, you can use the
EventSourcebrowser API. Check out the official MDN docs to learn more.
Alternatively to setting the event name and its data in the node, you can specify them using the msg.topic and msg.payload property.
Example: Setting the event's data and type
// When setting the message's topic and payload...
msg.topic = 'message'
msg.payload = {
  hello: 'world'
}

// ... the resulting event sent to a client looks like this:
event: message
data: "{'hello': 'world'}"

// A frontend client using Javascript's EventSource api can then access this message like so:
const sse = new EventSource('http://localhost:1880/api/sse');
sse.addEventListener('message', (event) => {
  console.log(event);
})
Example: Using a custom topic / event type
As you saw in the example above, each event can have a specific type. The default type for SSE is 'message'. If you would like to change the name of the event type, you can set the msg.topic to a custom name. This can be useful when using several distinct events you would like to send to one or several connected clients.
Note that EventSource has reserved keywords, such as 'error' and 'open' which should not be used as a SSE event name.
// When setting the message's topic and payload...
msg.topic = 'reload'
msg.payload = {
  reload: true,
  date: new Date()
}

// ... the resulting event sent to a client looks like this:
event: reload
data: "{'reload': true, 'date': '...'}"

// A frontend client using Javascript's EventSource api can then access this message like so:
const sse = new EventSource('http://localhost:1880/api/sse');
sse.addEventListener('reload', (event) => {
  console.log(event);
})
SSE Client Node
The SSE Client node allows you to subscribe to SSE servers and receive real-time updates from them.
To set up the SSE Client node, follow these steps:
- Drag and drop the SSE Client node from the Node-RED palette onto your flow.
- Configure the SSE Client node by specifying the URL of the SSE server to subscribe to.
- Connect the SSE Client node to the desired downstream nodes in your flow.
- Deploy your flow to activate the SSE Client.
- Once the SSE Client is subscribed to a server, it will receive events in real-time.
Example: Configure the node
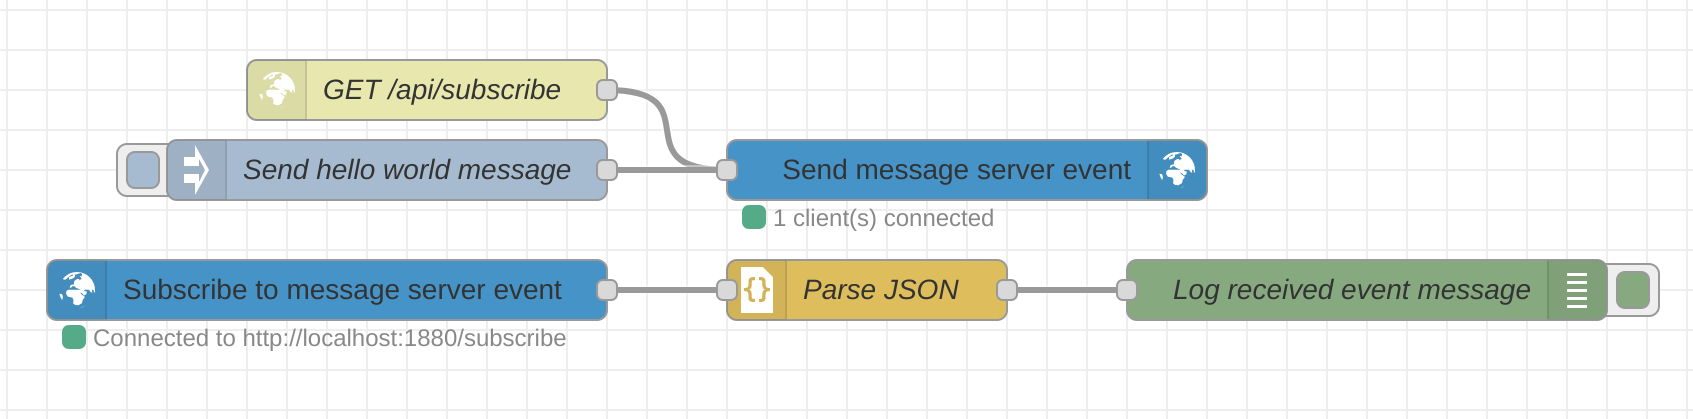
Here's an example scenario to illustrate the usage of the SSE Server and SSE Client nodes together:
- Set up an SSE Server node with an HTTP endpoint
/subscribeand an event namemessage. - Connect the SSE Server node to a function node that generates a random temperature value.
- Set up an SSE Client node and configure it to subscribe to
http://localhost:1880/subscribeand put an event name ofmessage. - Connect the SSE Client node to a debug node to display the received event data.
- Deploy the flow and open the Node-RED editor.
- The SSE Client node will receive the event SSE node in real-time and display it in the debug node.
You can also find an example flow in the package repository
Example: Configure HTTP request headers
When a subscription is established, HTTP headers may be sent to the receiving endpoint. You can configure these in JSON format. In the client node, you can add headers using a key-value pair like so:
{
  "authorization": "Basic abcdef==",
  "accept": "application/json"
}
Example HTML client
Copy-paste this markup into an HTML page:
<!DOCTYPE html>
<html lang="en">

<head>
  <meta charset="UTF-8">
  <meta name="viewport" content="width=device-width, initial-scale=1.0">
  <title>Node Red SSE Test</title>
</head>

<body>
  <h1>Node Red SSE Test</h1>
  <p>This is a test page which will subscribe to an SSE Server powered by <a href="https://www.npmjs.com/package/@tq-bit/node-red-contrib-server-sent-events"
      target="_blank"><code>node-red-contrib-server-sent-events</code></a></p>
  <p>Enter your input to this field and click submit</p>

  <input id="input" type="text" placeholder="http://localhost:1880/subscribe" />
  <button id="submit">Submit</button>

  <h2>Status</h2>
  <div id="status">Not connected</div>

  <h2>Messages</h2>
  <div id="messages">
    <p>Messages sent from an SSE server will be displayed here</p>
  </div>

  <!-- Script to handle the EventSource API -->
  <script>
    const input = document.getElementById("input");
    const submit = document.getElementById("submit");
    const status = document.getElementById("status");
    const messages = document.getElementById("messages");

    submit.addEventListener("click", () => {
      const url = input.value;
      const eventSource = new EventSource(url);

      eventSource.addEventListener('open', () => {
        status.innerHTML = `Connected to ${url}`;
      })
      eventSource.addEventListener('error', () => {
        status.innerHTML = `Disconnected from ${url}`
      })
      eventSource.addEventListener("message", (event) => {
        messages.innerHTML += `<p>${event.data}</p>`;
      });
    });
  </script>
</body>
</html>
Support and Feedback
If you encounter any issues or have any feedback regarding the Node-RED SSE Package, please feel free to open an issue on the package's GitHub repository. I appreciate your feedback and will do my best to address any problems or feature requests.
License
The Node-RED SSE Package is released under the Apache 2.0 license. Please refer to the license file in the package repository for more information.